Photo Etching At Home
Photo Etching was one of those things that I had always wanted to have a go at. I researched the various methods on the internet and was pretty disappointed as most of the time I could only see problems that would stop me attempting this. The availability or cost of both chemicals and materials made me question the value of pursuing this. It often seemed that Photo Etching was something that could not really be achieved successfully in the home workshop.
I continued to research and finally found a way to attempt Photo Etching that was not excessively expensive. All of the chemicals and materials were available locally and it did not involve photosensitive chemicals or materials etc.
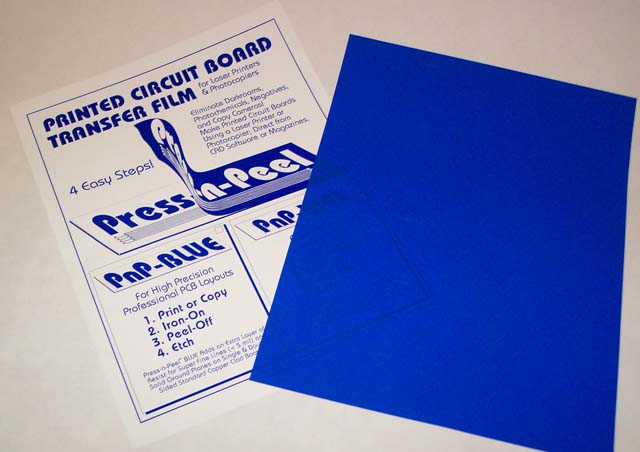
I came across a product called Press-n-Peel Blue at the local electronics store. This product is available in Australia through Jaycar dealers. The Press-n-Peel Blue is used to make small printed circuit boards and only requires access to a computer, a laser printer and a normal clothes iron. The recommended etching chemical (Ammonium Persulphate) is also relatively inexpensive and is not as nasty as the Ferric Chloride that is generally used.
I have experimented with this process and have had some pretty good results given the agricultural nature of my set up. I have tried both single and double sided etching and I have been pleased with what I have been able to produce. The process is certainly not perfect but it is able to produce some unique components that are generally not available for the models that I build.
How it works
The basic principle here is that a mirror image black and white drawing is printed onto the Press-n-Peel film using a laser printer or a photocopier. The image is then transferred to brass sheet by melting the image (the black toner) with the heat of an iron, cooling the brass and then peeling the film backing away. The brass sheet is then immersed into a chemical that dissolves the uncoated areas of brass leaving the brass under the image untouched.
As with any of these sorts of things nothing is ever perfect and sometimes it takes a few experiments with the equipment before you get an acceptable result. Don’t expect to get professional quality results all the time, there are just too many things that can and will go wrong. Be assured though, that if you take your time and follow the instructions on the Press-n-Peel then you will be able to produce items of an acceptable quality.
The equipment required
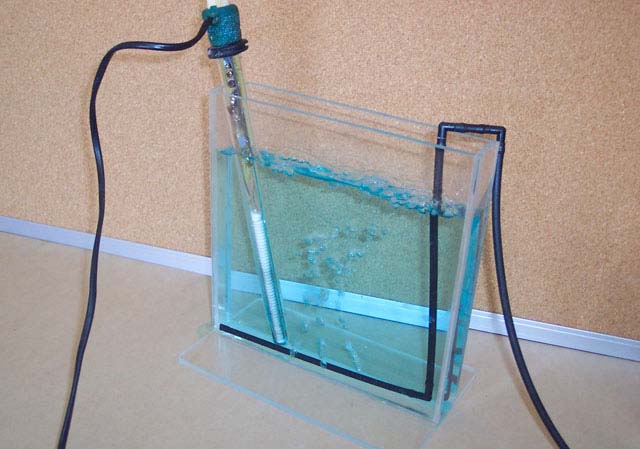
Below is the Photo Etching process and the equipment that I used. Because the etching chemical works best at about 50-60 degrees centigrade I built a small etching tank and used a fish tank heater to heat the etchant. I also incorporated an aeration system to help speed up the process by agitating the etching solution.
 This photo shows my etching set up. It shows the pespex tank with the fish tank heater and the aeration system in place. The black plastic mesh is used to hold the piece of brass while it is suspended in the etching solution. The Ammonium Persulphate is a white crystal/powder in the plastic container which is dissolved in water in accordance with the manufacturers directions.
The Materials
The Materials and equipment required are:
- A computer with a suitable drawing program – I used Corel Draw
- Press-n-Peel Blue transfer film -from a Jaycar dealer – about $35 for 5 sheets
- A laser printer or photocopier to transfer the drawing onto the film
- Ammonium Persulphate as the etching chemical – from a Jaycar dealer – about $10 for 500 grams
- Brass sheet – from local hobby shop or by mail order from Micro Mark
- A container to hold the etchant
- A fish tank heater to heat the solution
- An air pump or compressor to agitate the etchant and
- Acetone to remove the toner from the brass.
Step By Step
 1. Draw the parts that you wish to produce to the required size using an appropriate drawing program on your home computer. I use Corel Draw but any similar program will do. You need to remember that the drawing has to be a mirror image of what you eventually want to produce.
 2. Follow the instructions on the packet of the Press-n-Peel and print the drawing onto the film using a laser printer. Don’t be tempted to use an inkjet because the process will not work.
 6. Prepare your etching solution in accordance with the instructions on the container. In the case of Ammonium Persulphate it works best at about 50 to 60 degree centigrade so you need to heat the solution with a fish tank heater. Suspend the brass in the solution and let it do its job. I found that agitating the solution with some compressed air at a very low pressure worked best for me. I also found that rotating the brass by 90 degrees every few minutes gave a better end result.
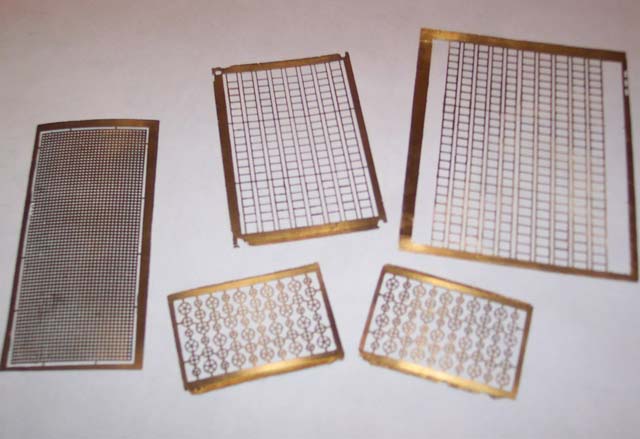 7. Once the etchant has dissolved all of the unwanted areas of the brass sheet it can be removed from the solution and run under some cold water to stop the process. The toner can then be cleaned off with acetone leaving the finished product.