
When I need to make a few items the same it is often easier to make one or two to use as masters and then produce a mould of these masters and then mould the number of items required in resin. This is not always as easy as it sounds. I have tried all sorts of ways of making a mould from pressing a master into plasticine, to using plaster, to using aluminum foil. While each of these methods can produce acceptable results they are not able to make multiple items from the one mould as usually the mould is destroyed to get the cast resin part out.
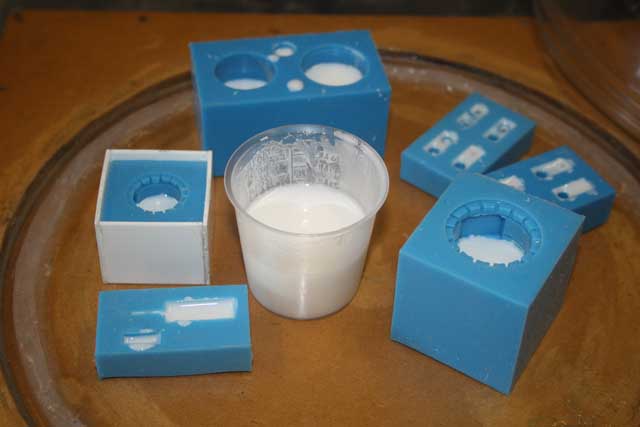
I find that the simplest material to use for a mould is an RTV moulding rubber. There are many different types of moulding rubber available so a little research will be required to ensure that you get the right material for the items that you wish to cast.
For casting parts I have recently started using polyurethane resin rather than polyester resin. Polyurethane resin is a much better option as it gives very good results but it is a little more expensive than polyester. Again there are many different types of polyurethane resin available so a little research may be required to find one that is suitable.
The process that I have recently been using to mould resin parts is explained below.
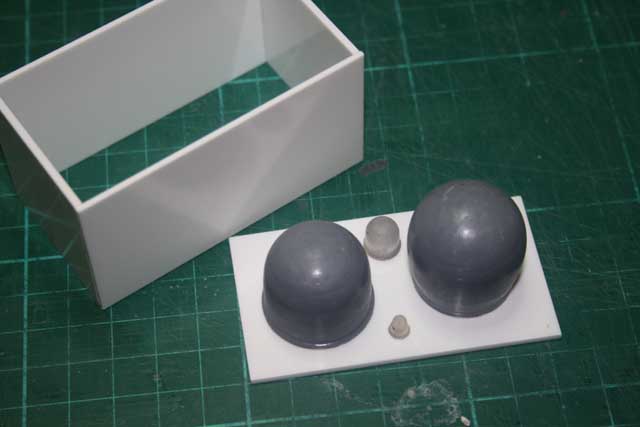 Masters
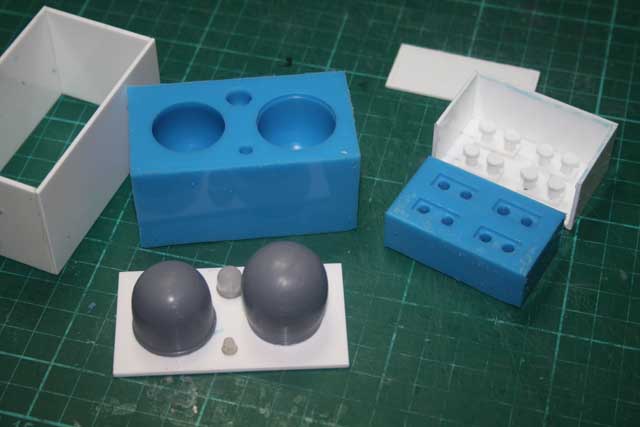
I often make the parts to be copied, (the master or plug), out of a variety of materials including acrylic (perspex), styrene and wood. The parts are then stuck to a piece of flat sheet with double sided tape. Walls are then glued together to make an open top box.
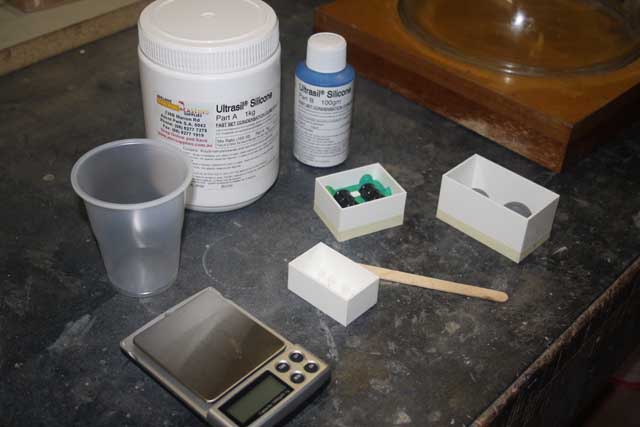 Equipment
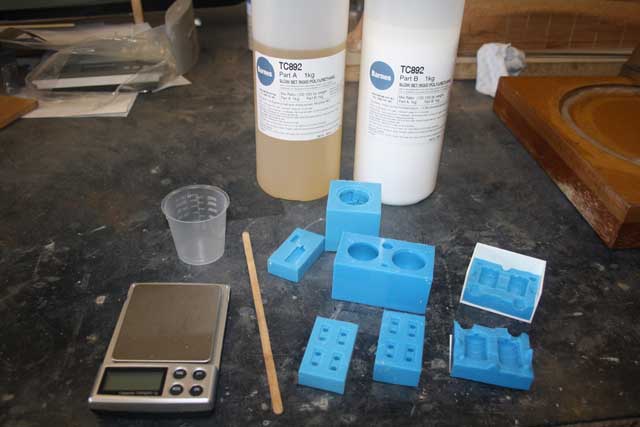
It is important to have everything that you need at hand before you start. A mixing container, scales, mixing stick, masters and moulding rubber. I also use a vacuum chamber to remove air bubbles.
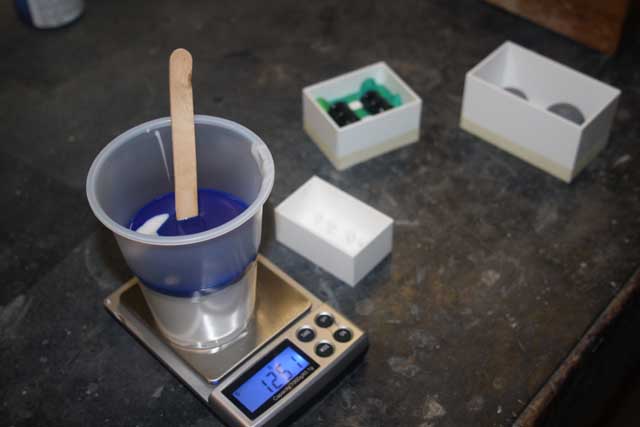 Mixing the rubber
I have been using a two part RTV rubber called Ultrasil It is essential to mix the two parts in the correct ratio so it is best to use a small set of scales to measure the appropriate amounts of each part.
 De-airing the mixture
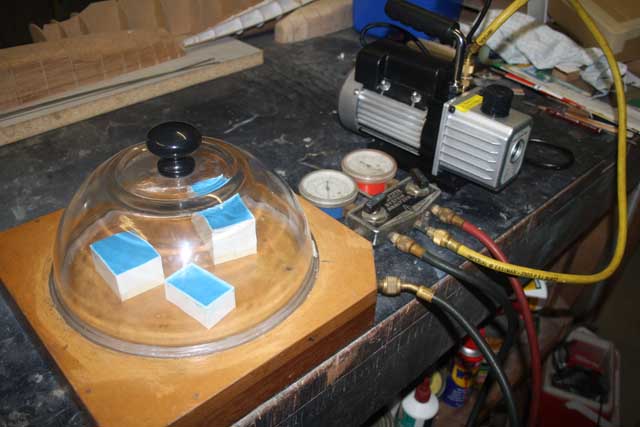
After the rubber is mixed I generally place the container into the vacuum chamber for a couple of minutes to get most of the air bubbles out. Then I half fill each moulding box with the rubber mix.
 Vacuum Chamber
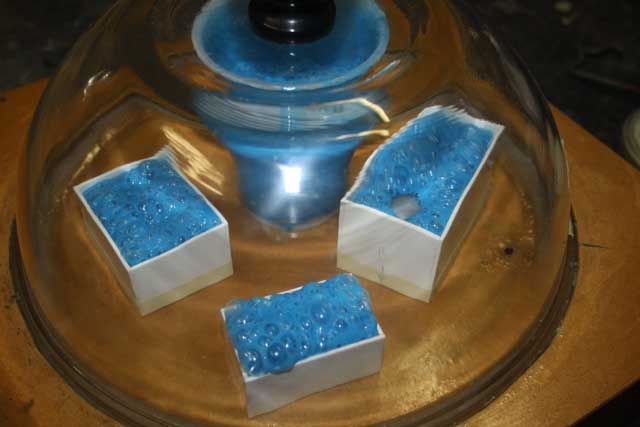
The vacuum chamber really pulls the air bubbles out of the mixture and gives a much better quality mould. It is possible to make a mould without the vacumm chamber but this photo shows just how much air is trapped during mixing.
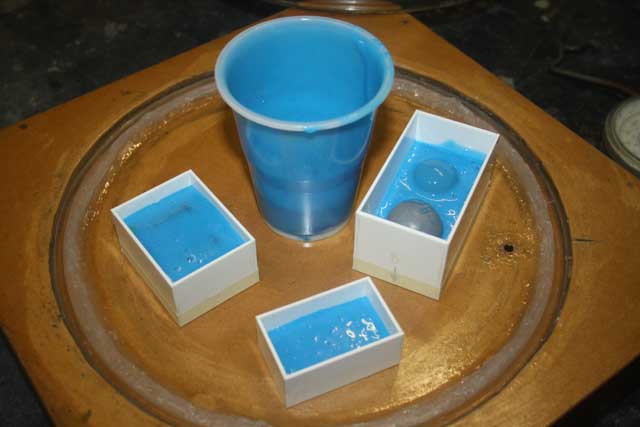
 Top up
Moulds are filled to the desired level and again placed back into the vacuum chamber for a couple of minutes.
 Remove the Moulds
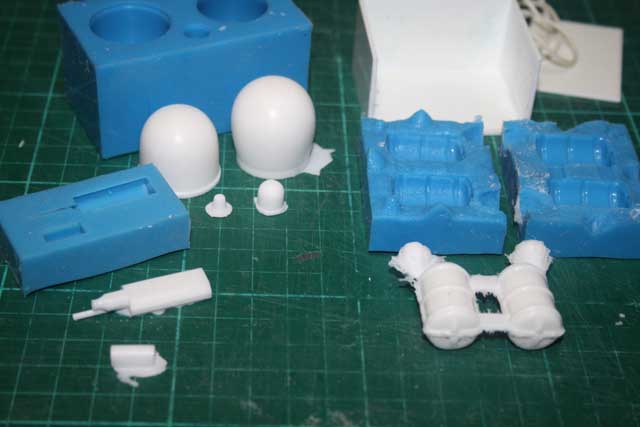
After about 24 hours the rubber moulds can be removed from the boxes and the master removed from the moulds. The rubber moulds are quite flexible and can be reusable many times over.
 Prepare to Cast Resin
Again before casting the resin parts all equipment is assembled ready for use. I have been using a polyurethane resin for my parts. In this case TC892 which is a slow setting resin giving a working time of up to 20 minutes.
 Mixing the Resin
It is important to mix the resin accurately so again I use a set of scales. When both parts are mixed you need to work quite quickly. The first thing to do is place the mixed resin into the vacuum chamber for a short time to de-air. Then again half fill each mould and place back into the chamber. The final fill of the moulds needs to be just over-full as the resin tends to settle just a little as it cures.
 Remove the Castings
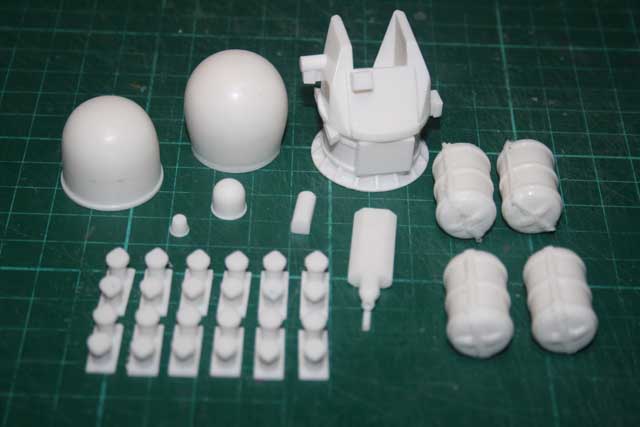
After the resin has cured the cast parts can be removed from the moulds.
 Finished Parts
Each part will generally require a small amount of cleaning up before it is ready to fit to a model.